

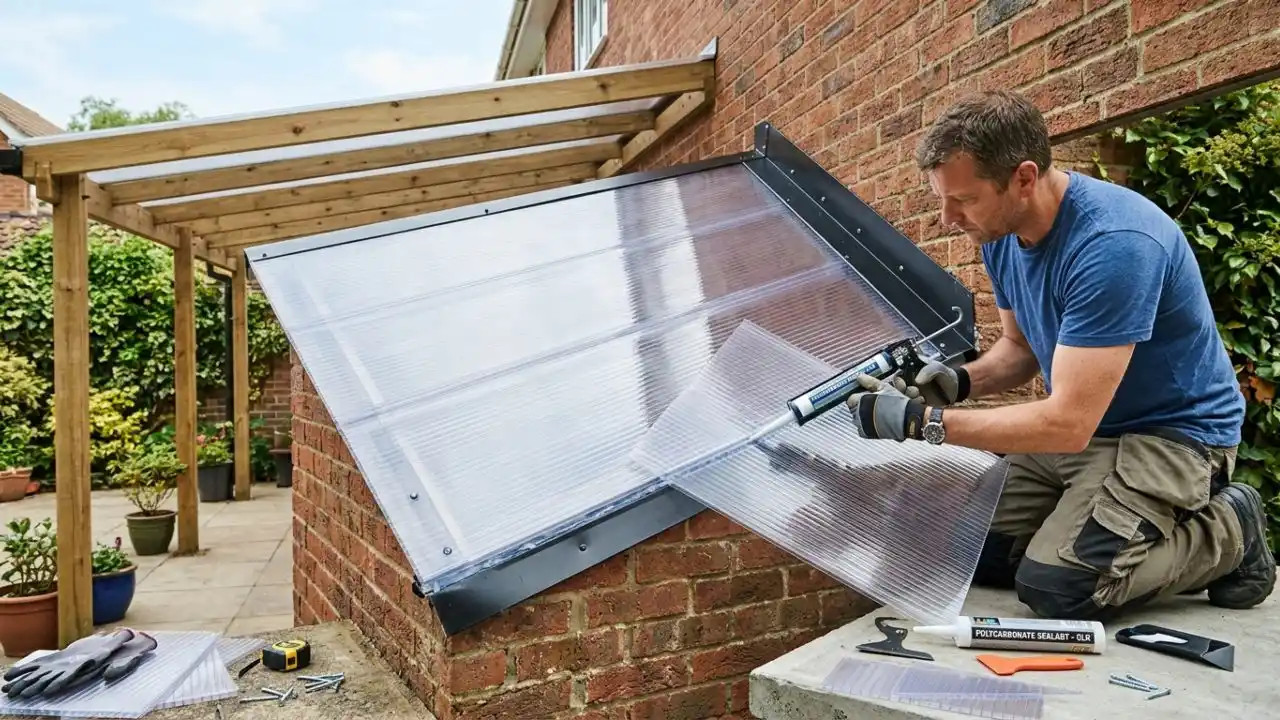
Polycarbonate roofing sheets are a popular choice for covering patios, conservatories, carports, garden shelters, and outdoor extensions. They are lightweight, durable, let in natural light, and resist changing weather conditions. However, one area that often causes problems during installation is the connection between the roofing sheets and an adjoining wall.
If this joint is not sealed correctly, rainwater can enter through small gaps, causing damp patches, leaks, mould growth, and damage to nearby building materials. Even a professionally installed roof can develop problems if the wall connection is not properly protected.
Understanding how to seal polycarbonate roofing sheets to a wall is therefore important for anyone planning a roofing installation or repairing an existing structure. Choosing suitable flashing, compatible sealants, and correct installation techniques can help create a watertight connection that lasts for years.
Why Is Sealing Polycarbonate Roofing Sheets to a Wall Important?
The joint where a polycarbonate roof meets a wall is particularly vulnerable to water penetration. Rainwater can run down the wall, collect at the roof edge, or enter through small gaps between different materials.
Unlike traditional roofing materials, polycarbonate expands and contracts as temperatures change. This natural movement means the connection must be waterproof without being completely rigid.
Proper sealing offers several benefits:
- Prevents water leaks: Stops rainwater from entering through the roof-to-wall connection.
- Protects building materials: Reduces the risk of dampness, rot, and deterioration.
- Improves insulation: Helps minimise unwanted air movement through gaps.
- Extends roof lifespan: Protects the installation from unnecessary moisture-related damage.
- Reduces maintenance: A properly installed flashing system requires fewer repairs.
Sealing is not simply about applying a thick layer of silicone. The correct installation method combines mechanical protection, appropriate flashing, and compatible waterproofing materials.
Materials Needed to Seal a Polycarbonate Roof to a Wall
Before you start, gather the necessary materials and confirm they suit your roofing system.
Common materials include:
- Wall flashing: A metal or compatible polycarbonate flashing component that directs rainwater away from the joint.
- Neutral-cure silicone sealant: A suitable weather-resistant sealant designed for polycarbonate.
- Foam closure strips: Help close exposed sheet profiles and prevent water and debris from entering.
- Roofing screws: Appropriate fixings with weather-resistant sealing washers.
- Cleaning materials: A soft cloth and mild cleaning solution.
- Measuring tape: Helps determine the required flashing dimensions.
- Drill and suitable fixings: Used to secure the flashing to the wall.
Always check the roofing manufacturer’s recommendations before purchasing sealants. Some chemicals, particularly incompatible solvents and certain sealant formulations, can damage polycarbonate or cause cracking.
Step-by-Step: How to Seal Polycarbonate Roofing Sheets to a Wall
A reliable roof-to-wall connection requires careful preparation. Follow these steps for a more durable, waterproof finish.
1. Inspect and Clean the Joint
Start by examining the area where the polycarbonate sheets meet the wall. Look for existing gaps, loose fixings, damaged flashing, accumulated dirt, and old sealant.
Carefully remove loose debris and any failed sealant. Clean the wall surface and roofing connection using a soft cloth and a mild cleaning solution approved for polycarbonate.
Allow everything to dry completely before continuing.
Avoid using abrasive brushes, harsh solvents, or sharp tools that could scratch or damage the roofing panels.
2. Measure the Roof-to-Wall Connection
Measure the full length of the joint where the roofing sheets meet the wall.
You need enough flashing to cover the connection and direct rainwater onto the roof surface. The required dimensions depend on the roof pitch, wall construction, and roofing profile.
For most installations, flashing should extend sufficiently up the wall and over the roofing sheets to protect the joint.
Do not assume that a small strip of sealant will provide the same protection as properly designed flashing.
3. Install Suitable Wall Flashing
Flashing is one of the most important parts of a waterproof roof-to-wall connection.
Position the flashing so that its upper section protects the wall connection while its lower section overlaps the polycarbonate roofing sheets.
Depending on the building design, a stepped flashing, apron flashing, or purpose-made wall flashing may be appropriate.
For masonry walls, ideally install the upper edge into a suitable reglet or protect it with a properly designed counterflashing system. Simply attaching flashing to the wall surface and covering its top edge with sealant may not provide long-term protection.
Secure the flashing using compatible fixings and follow the manufacturer’s installation instructions.
4. Apply Compatible Waterproof Sealant
Once the flashing is positioned correctly, apply a continuous bead of compatible neutral-cure silicone or another sealant specifically approved for the materials involved.
Focus on the upper flashing-to-wall connection and other joints where the manufacturer’s instructions require sealing.
Smooth the sealant carefully to create a consistent finish without leaving holes or gaps.
Polycarbonate sheets expand and contract with temperature changes. Therefore, avoid bonding the moving roofing panel rigidly to the wall unless the roofing system specifically requires that arrangement.
Use a sealant that can accommodate the expected movement.
5. Install Foam Closure Strips Where Required
Polycarbonate sheets with corrugated or multiwall profiles may have openings that allow wind-driven rain, insects, and dust to enter.
Foam closure strips designed for the specific roofing profile help close these openings.
Install them according to the manufacturer’s instructions, ensuring they fit properly without obstructing the roof’s required drainage or ventilation.
For multiwall sheets, use the correct end tapes and profiles rather than filling open channels with ordinary silicone.
6. Check Fixings and Allow the Sealant to Cure
Inspect the screws, washers, flashing, and sealed joints. Replace damaged washers and tighten loose fixings according to the manufacturer’s recommended torque.
Avoid overtightening because excessive pressure can damage polycarbonate sheets and restrict their natural movement.
Allow the sealant to cure for the period stated on its packaging before exposing the joint to water.
Common Mistakes to Avoid During Installation
Understanding how to seal polycarbonate roofing sheets to a wall also means knowing which installation mistakes can lead to future problems.
Here are some common issues to avoid:
- Using ordinary silicone: Not all silicone sealants are compatible with polycarbonate. Always check the product specification.
- Ignoring flashing: Sealant alone is not a dependable substitute for properly designed flashing.
- Overtightening screws: Excessive pressure can crack sheets or damage sealing washers.
- Blocking drainage channels: Incorrectly applied sealant can prevent water from draining away.
- Ignoring thermal movement: Polycarbonate expands and contracts, so joints must accommodate movement.
- Applying sealant to wet surfaces: Moisture, dust, and grease can reduce adhesion.
Avoiding these mistakes can significantly improve the performance and durability of your roofing installation.
How to Maintain a Sealed Polycarbonate Roof
Even a correctly installed roof requires occasional maintenance. Inspect the wall connection at least twice a year and after severe storms.
Look for cracked sealant, loose flashing, damaged washers, blocked drainage channels, and signs of moisture on the interior wall.
Clean the roofing sheets using manufacturer-approved cleaning products. Avoid pressure washing close to sealed joints because excessive water pressure can force moisture into vulnerable connections.
If you discover a leak, identify its actual source before applying additional sealant. Water can travel along the underside of roofing sheets, meaning the visible damp patch may not be directly below the original opening.
For significant flashing damage, persistent leaks, or work involving a high or steep roof, consider hiring a qualified roofing professional.
Frequently Asked Questions (FAQs)
1. What is the best sealant for polycarbonate roofing sheets?
A compatible neutral-cure silicone sealant is commonly suitable for sealing certain polycarbonate roofing connections. However, always check the manufacturer’s recommendations because not all silicone products are compatible with every polycarbonate sheet or coating.
2. Can you use silicone between polycarbonate sheets and a wall?
Yes, but only when the silicone is specifically approved for polycarbonate and the adjoining wall material. Use it as part of a suitable waterproofing system, not as the only protection against rainwater.
3. Do polycarbonate roofing sheets need flashing against a wall?
Yes, a properly designed flashing arrangement is strongly recommended for most roof-to-wall connections. Flashing directs rainwater away from the joint and provides more reliable protection than surface sealant alone.
4. How do you stop rainwater entering under polycarbonate roofing?
Use correctly installed wall flashing, compatible sealant, suitable closure strips, and properly fitted roofing fixings. Also check that the roof has an adequate slope and that drainage channels remain clear.
5. Does polycarbonate roofing expand in hot weather?
Yes. Polycarbonate expands when temperatures rise and contracts when temperatures fall. Installers should allow the movement specified by the manufacturer to prevent cracking, buckling, or joint failure.
6. How often should roof-to-wall seals be inspected?
Inspect the connection at least twice a year and after severe weather. Look for deteriorating sealant, loose flashing, damaged washers, and signs of water penetration.
Conclusion
Sealing a polycarbonate roof where it meets a wall requires more than simply filling visible gaps with silicone. A durable connection depends on correct flashing installation, compatible waterproof sealant, suitable closure strips, and enough space for natural sheet movement.
By following the right installation techniques and carrying out regular inspections, homeowners can reduce water leaks, protect surrounding building materials, and improve the long-term performance of their roofing systems.
Whether you are installing a new patio cover, upgrading an existing conservatory roof, or repairing a leaking outdoor shelter, careful preparation and the right materials make a significant difference. When the installation involves complex flashing details or difficult roof access, professional assistance is the safest approach.